To get accurate text in an AI image, save the exact wording first, ask for a short headline and one details line with their positions, then check the actual file letter by letter. Fix one line at a time. When the text must stay exact or change often, put it in a regular text layer over a clean background.
A headline can look great in an image and still contain an extra letter, a reversed time, or the wrong price. In this guide, we will create a small poster for a fictional café, check the wording against a fixed reference, and see how to proceed when the text needs to be accurate and easy to update. The exercise works for a post, an invitation, or a short ad.
For what OpenAI documents about ChatGPT Images today, without a fresh UI re-test, see our ChatGPT Images 2.5 review.
Before you start: what to prepare
You need an image-generation tool available in your account, somewhere to save the files, and a graphics editor that supports text boxes. You can start by requesting an image in ChatGPT, then attach it and request an edit. Generation availability and quotas depend on your plan and account settings. See OpenAI’s image-generation documentation.
All the example materials here are original. The café, event, and price are fictional.
1. Save the wording before generating an image
Write the copy in a document or note. This is the text you will return to for every check, even if you later prefer something the generator invented.
Reference copy:
Headline: Morning Coffee
Details line: Friday | 9:00 AM | $7
The details line has three groups in a fixed order: day, time, price. The time must read exactly 9:00 AM, and the price must show the dollar sign and the number 7. Check the visible result, not just the string you pasted. In our test, the same structure was written in a right-to-left language, where the groups run from right to left. Lines that mix a right-to-left script with numbers are a common place for order errors.
For the exercise, we will request a square image measuring 1024 by 1024 pixels. Write down the intended dimensions: those also need to be checked in the resulting file.
2. Request a simple design with two defined lines
Start with a short headline and a single details line. More text makes checking and focused corrections harder. Copy the following prompt (an English version of the one we used; not run in English):
Create an original square poster, 1024 by 1024 pixels, for a fictional café. A gentle illustration of a ceramic coffee cup on a table, warm morning light, and a background in cream and brown tones. At the top, leave a quiet area for a large, clear headline, and at the bottom a smaller but readable details line. The headline on exactly one line: “Morning Coffee”. The details line exactly: “Friday | 9:00 AM | $7”. Keep the order of the details groups: Friday, then 9:00 AM, then $7. Use simple letterforms, with no effects that hide letters. Do not add any other text, logo, watermark, or business name. Leave generous margins on all sides.
You can change the colors and subject, but keep the exact text in quotation marks and specify its position. OpenAI recommends short, precise wording, an explicit location, and clarification about whether other text may be added. See the provider’s guidance on text within images.
3. Check the actual file, not just the chat preview
Save the first image before changing anything. Open it at 100% zoom, then at the size people are likely to see in practice. Work through three checks:
- Letters and words: Does it say exactly “Morning Coffee”? Is “Friday” complete? Look for a doubled letter, an odd connection, or clipping at an edge.
- Numbers and symbols: The time is 9:00 AM, the price is $7, and there are two separators. It is not enough for the line to “look like” a details line.
- Fitness for use: The text does not disappear into the background, the details remain readable when the image is small, and the actual dimensions suit the destination.
You can ask AI to transcribe the image as an additional check. You still need to compare it yourself: an accurate transcription does not prove that every letter in the image is drawn well.
What happened in our experiment
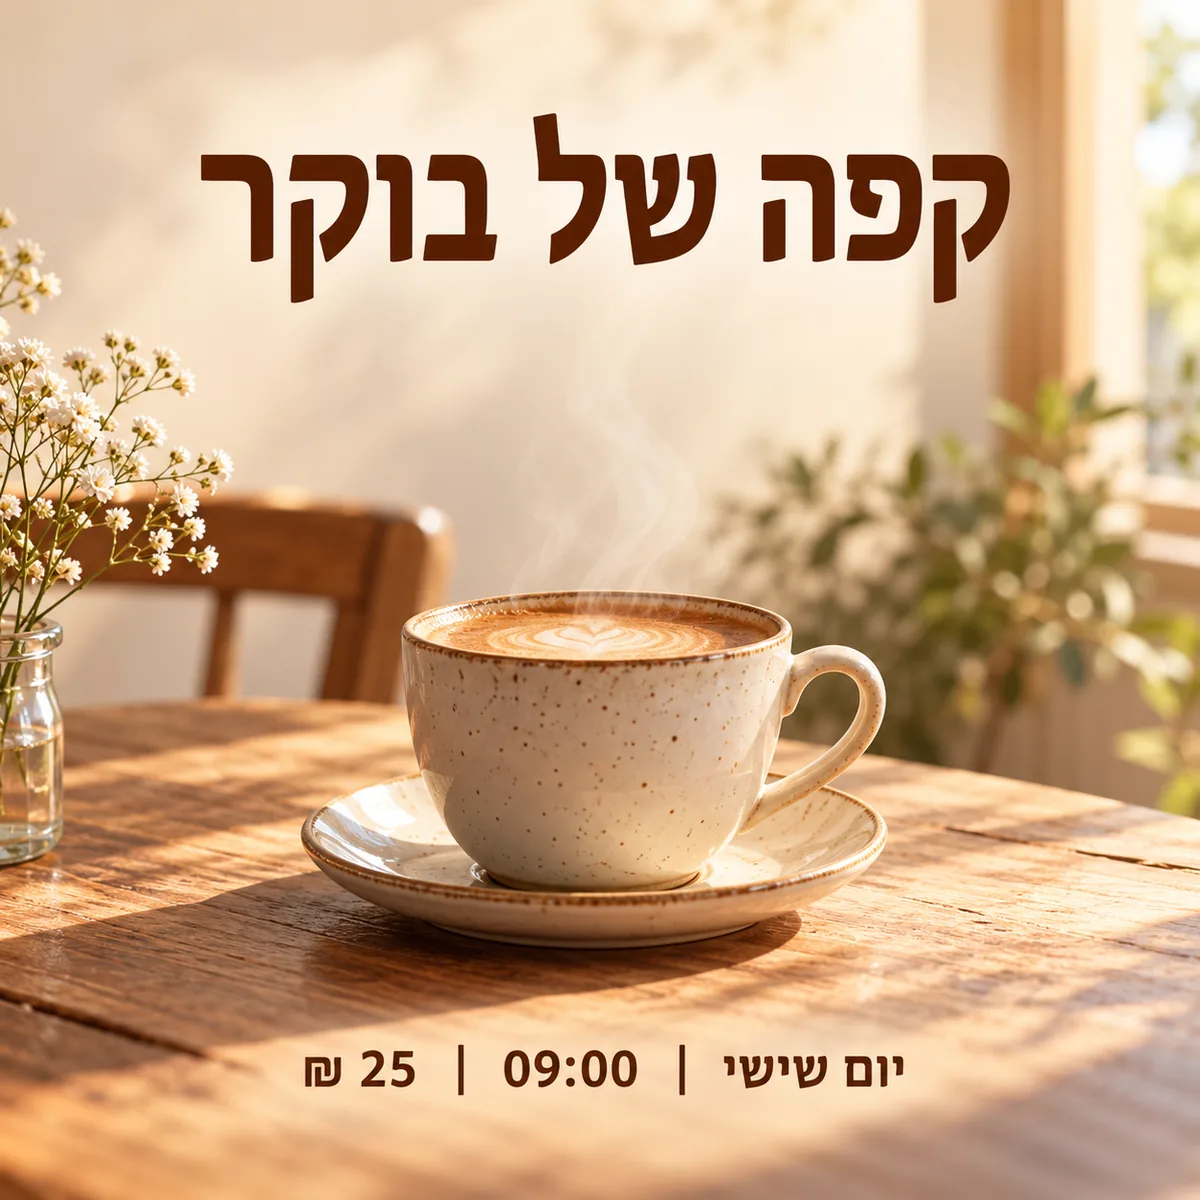
On October 2, 2026, we ran our right-to-left version of the prompt once in the built-in imagegen tool. On visual inspection, the headline and details line were readable and matched the reference copy. We found no spelling error requiring correction.
Even so, two requirements were not met exactly: the file measured 1254 by 1254 pixels, although we had requested 1024 by 1024; and the result looked more photographic than the gentle illustration we requested. We kept the original result unchanged. The useful habit to take from this is to check requirements beyond spelling too.
4. If there is an error, request a one-line replacement
Attach your chosen version and specify which line to replace and what to replace it with. “Fix the text” leaves both what to change and what to preserve unclear. For an error in the details line, you can use this template:
Edit the attached image. Replace only the details line at the bottom with this exact text: “Friday | 9:00 AM | $7”. Keep the order of the groups: Friday, 9:00 AM, $7. Do not change the headline “Morning Coffee”, the cup, the lighting, the colors, or the crop. Do not add any other text.
This is a correction template for you to use; we did not run it in the experiment because no text error was found. If your interface offers area selection, you can select the line. Even then, check the whole image after the edit.
Save the correction as a new file. Put both versions side by side: is the headline unchanged? Has an object moved? Have the image edges or background colors changed? If the text is still wrong after a focused attempt, you can switch to a regular text layer rather than start a long sequence of new generations.
5. Prepare a clean background to keep the copy editable
If you want to update a time or price later, keep the wording separate from the image. You can ask for a text-free background from the start. If you already have an image you like, ask to remove its text (an English version of the request we used; not run in English):
Edit the attached image. Remove only the headline “Morning Coffee” and the entire details line at the bottom, and leave a natural, text-free background in their place. Preserve the cup, saucer, table, flowers, chair, window, lighting, colors, crop, and composition as closely as possible. Do not add any letter, number, logo, or watermark. This is a text-removal edit to prepare a background on which regular text will be added separately.
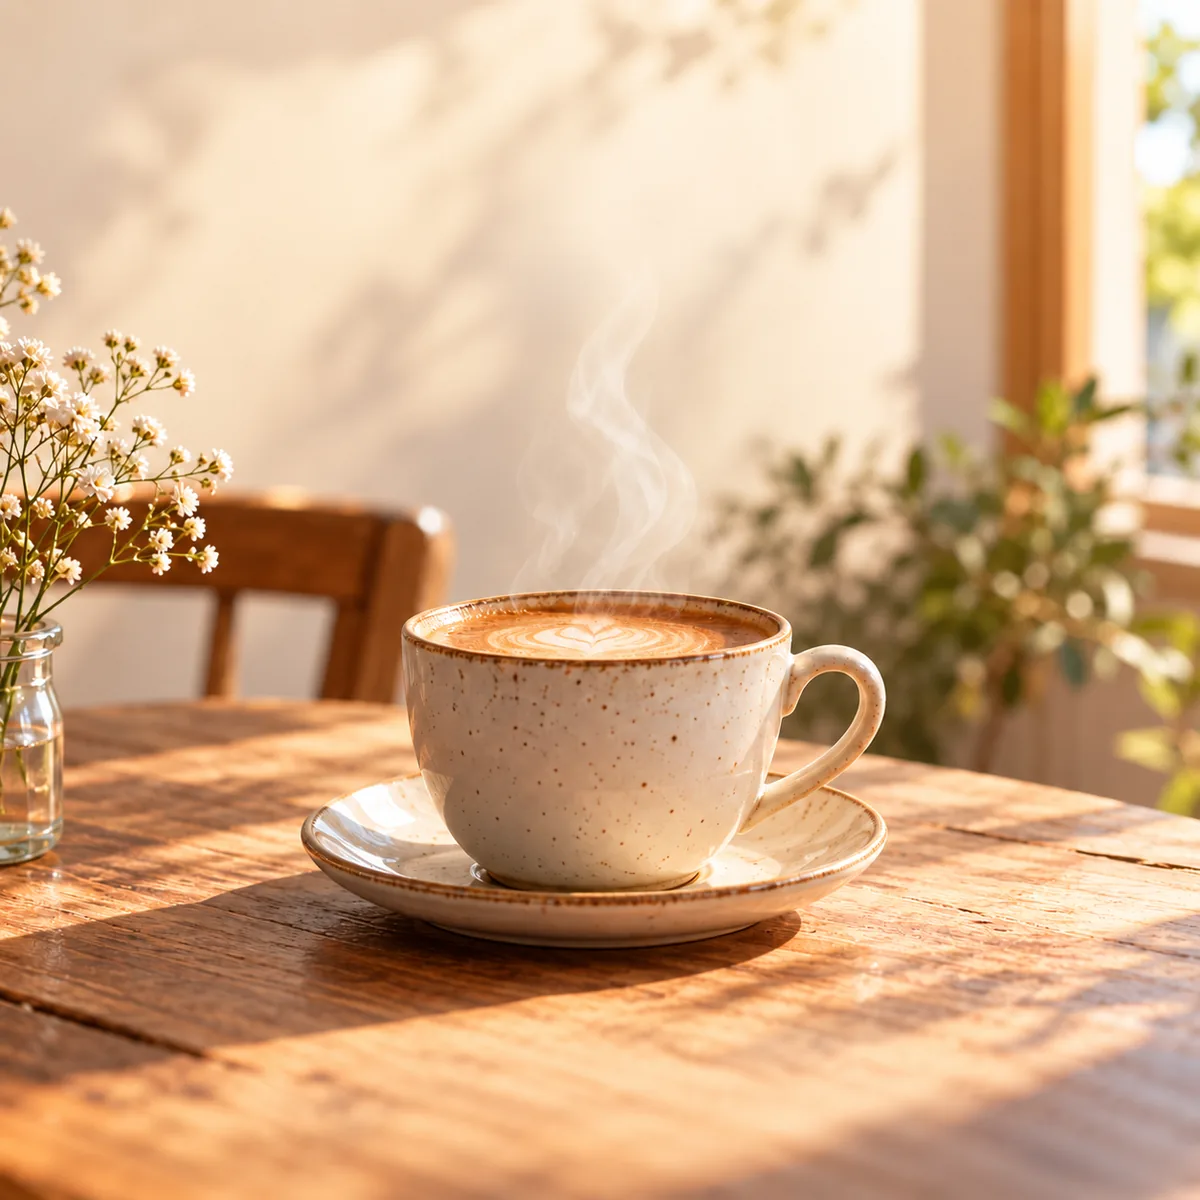
In our experiment, the removal request worked on the first attempt. The overall composition was preserved, but the image was not identical: for example, the shape of the steam above the cup changed. That is a good reason to compare areas you did not ask to edit too. This edit demonstrates background preparation, not the correction of a spelling error.
6. Add the text in regular text boxes
Open the background in your graphics editor and add one text box for the headline and another for the details. Paste the reference copy. Choose a font that supports every character you need, including accented letters and currency symbols, enlarge the headline, and leave space between it and the edges of the design.
According to Adobe Express documentation, you add text through Text and then Add your text. For right-to-left languages such as Arabic or Hebrew, the documentation describes a paragraph-direction control. Right alignment alone does not set the paragraph direction: also check the order of words and numbers. See adding text and setting RTL direction in Adobe Express.
If a mixed line becomes difficult, split it into three boxes: the day, the time, and the price, with separators between them. This lets you check each part separately. In a right-to-left language, do not manually reverse letters to compensate for the wrong text direction.
In our example, we added regular text layers in an SVG file, keeping the background and wording separate, and exported a PNG using Inkscape on a computer. The headline and details in the next image are regular text, not another successful image-generator result.
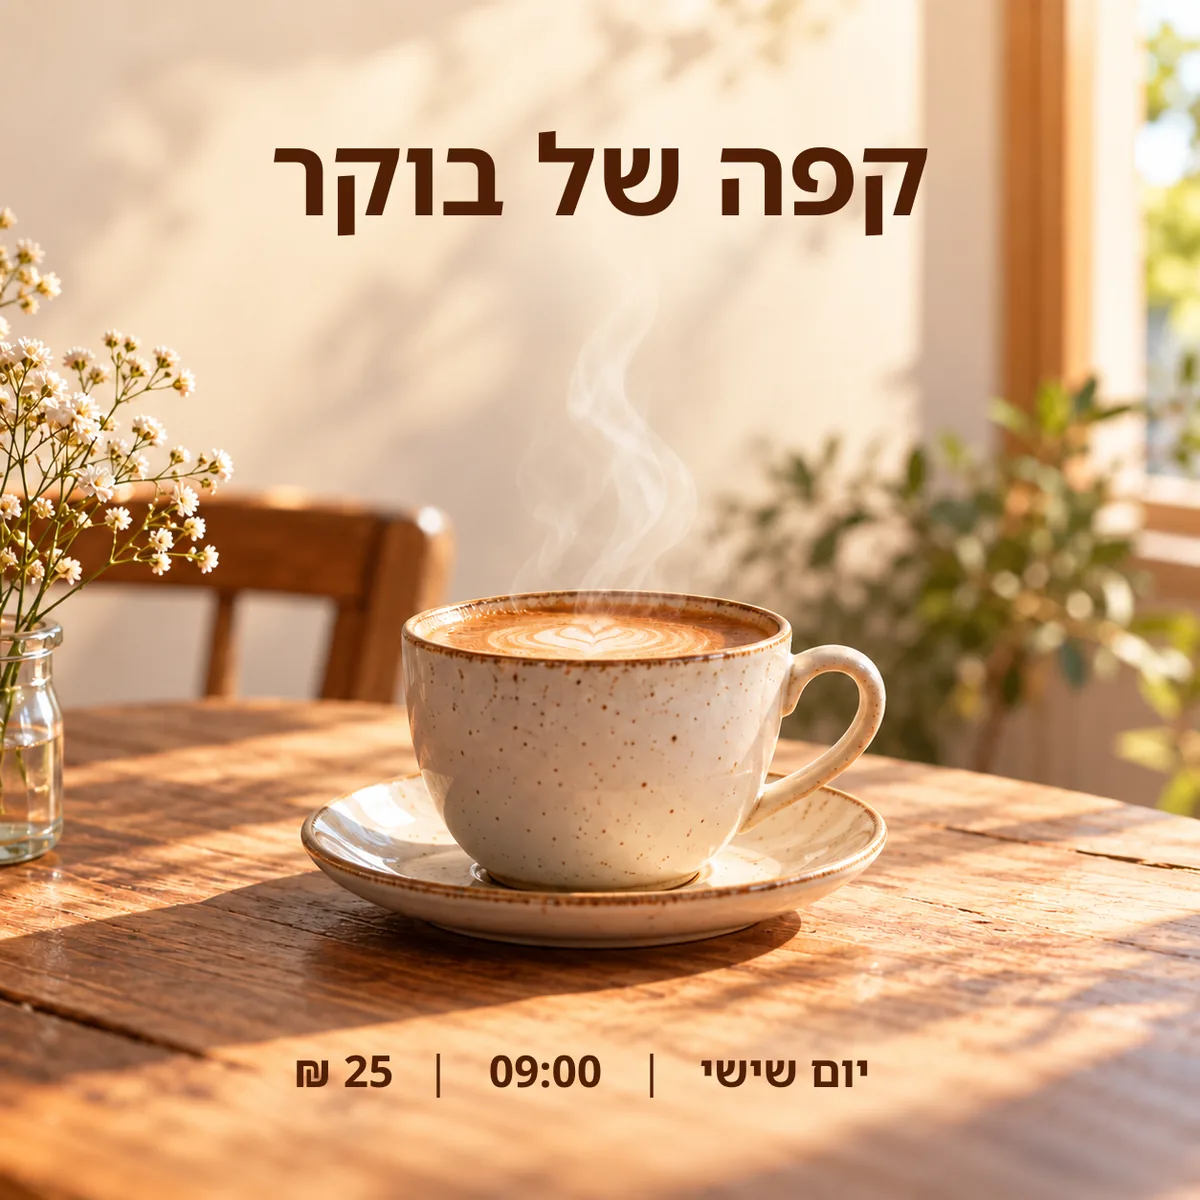
Adobe describes text insertion, PNG export, and a free plan. Before exporting, check that your chosen font and design do not require a paid upgrade. See Adobe’s explanation of text on images and export.
7. Export and do one last check
Save both the working project and a final PNG. A flattened file is convenient to share; a project with separate text lets you change the wording later. If the destination requires 1024 by 1024 pixels, set those dimensions on export and check the resulting file dimensions again. Our original files measured 1254 by 1254, as received; the copies on this page are resized for the web.
Open the PNG itself. Make sure the font has not been substituted, the time and price remain in the correct order, and no letter has been clipped. Also check a small preview: readability when enlarged does not guarantee readability in a post.
- The headline is exactly “Morning Coffee.”
- The day, time, and price match the original: Friday, 9:00 AM, $7.
- There is no extra wording, clipped letter, or unclear symbol.
- The dimensions and file format suit the intended destination.
- We have saved the original and the editable version.
- The important information also appears as regular text beside the image, so it remains readable and accessible outside the graphic.
The short route to a useful result: start with finalized wording, give the generator a precise request, check the file, and make focused corrections. When you need control over a time, price, or wording, an attractive background and a regular text layer give you a simple way to keep working.
Sources
- OpenAI: image generation documentation
- Adobe Help: Add text in Adobe Express
- Adobe Express: Text on photo